Top Summary Block (TL/DR)
MiniDV tapes, once the go-to format for home videos and indie projects, are deteriorating quickly. Camcorders and players reading them are becoming rare, risking your memories. The best way to save your footage is to transfer Mini DV to digital. This guide explains why and how to do it before your tapes become unusable.
MiniDV was revolutionary, offering digital quality in a compact form. But here’s the problem: like all magnetic tapes, they slowly degrade, losing quality and risking permanent data loss.
Also, the equipment that plays these tapes—camcorders and decks—is disappearing fast. Manufacturers have stopped making these devices, and repair parts are scarce. If you don’t act soon, the precious memories stored on MiniDV could vanish forever.
This article will explain MiniDV, why tapes fade, and how to convert MiniDV to digital safely. You’ll learn the benefits of digitization and how to pick the exemplary mini DV conversion service to protect your videos.
What Is MiniDV and Why Is It Fading?
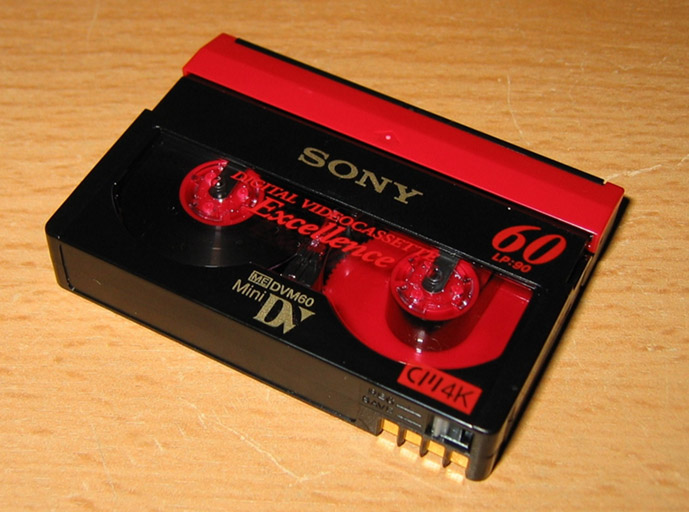
MiniDV is a digital video format that stores footage on magnetic tape inside a small cassette. It was widely used for personal and professional recording from the late 1990s through the 2000s. MiniDV tapes offered clear video quality and were a favorite for home movies, event recordings, and even indie filmmaking.
But here’s the catch: MiniDV tapes rely on magnetic tape technology, which is sensitive to:
- Heat and Humidity: Environmental factors can cause tapes to warp or mold.
- Physical Wear: Repeated playback or poor storage damages tape layers.
- Aging: Over 15-25 years, tapes naturally degrade, leading to loss of image and sound quality.
MiniDV camcorders and decks that read these tapes are no longer produced. This makes accessing your videos more difficult every year.
Why Should You Convert MiniDV to Digital Now?
Digitizing your MiniDV tapes isn’t just a nice idea—it’s a must. Here’s why:
- Preserve Precious Memories: Family events, weddings, travel footage, and personal milestones risk being lost forever.
- Avoid Hardware Issues: As MiniDV players become obsolete, finding working equipment grows harder.
- Easier Access and Sharing: Digital files can be viewed on modern devices, edited easily, and shared online.
- Space and Backup: Digital storage frees up physical space and allows multiple backups.
How MiniDV Conversion Works? Step-by-Step
MiniDV to digital conversion means transferring video footage from a tape to a digital file. Here’s a simple breakdown:
- Playback on a MiniDV Camcorder or Deck
The tape is played on a device that reads the digital signals encoded on the tape. - Signal Capture Using Digital Interface
The video signal is captured in real-time via a connection like FireWire (IEEE 1394) or HDMI to a computer or capture device. - Encoding into Digital Formats
The captured footage is saved as digital files in popular formats like MP4, MOV, or high-quality archival codecs like ProRes. - Quality Checks and Metadata Tagging
The digital files can be reviewed for playback quality and tagged with descriptive information for easier cataloging.
This process can be done by professionals using broadcast-grade equipment to ensure maximum quality and safety.
Choosing a MiniDV to Digital Transfer Service
Hiring a professional to convert mini DV to digital format is usually the best option to ensure your tapes are handled correctly. Here’s what to look for:
- Experience with MiniDV and Similar Formats
Specialists who understand the quirks of magnetic tape handling. - High-Quality Playback Equipment
Using well-maintained camcorders or decks reduces the risk of tape damage. - Output Flexibility
Ability to deliver your videos in formats optimized for playback, editing, or archiving. - Additional Services
Options for cleaning, repairing damaged tapes, file labeling, and cloud or physical storage. - Security and Confidentiality
Especially important for sensitive personal or professional footage.
Ask providers about turnaround time, sample transfers, and file backup options.
Best Practices Before Converting MiniDV Tapes
To get the best MiniDV conversion results:
- Make an Inventory
List your tapes, noting dates and contents if possible. - Check Tapes for Damage
Look for mold, tape warping, or sticky residue. - Label Tapes Clearly
Consistent naming helps organize the digital files later. - Prioritize Important Tapes
Convert fragile or irreplaceable tapes first. - Plan for Backup
After conversion, create multiple digital backups (cloud storage, external drives).
Case Examples: Why Are People Digitizing Old MiniDV Cameras?
- Emily, a mom from Ohio, digitized her children’s MiniDV tapes before the players stopped working. “I can finally watch my kids’ first steps on my laptop,” she says.
- Mark, an indie filmmaker, found lost footage on old MiniDV tapes. He had it professionally converted for a new documentary release.
- Sarah, a wedding videographer, offers MiniDV transfer services to her clients, helping them preserve cherished memories.
These examples show how digitization rescues valuable footage from disappearing.
Conclusion
MiniDV tapes are delicate, and the machines to play them are vanishing. The only way to preserve your priceless videos is to transfer MiniDV to digital.
Whether you do it yourself or hire a professional service, now is the time to act before your tapes become unreadable. Digitizing gives your memories a new life—easy to watch, share, and protect for generations.
Enjoyed this? Share this post with fellow fans and influencers, and be sure to check back regularly for the latest updates, insights, and news on all things simpcity!

